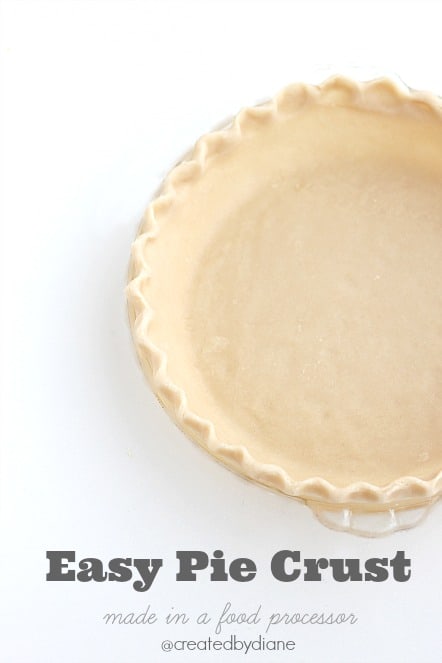
Easy Pie Crust made in a food processor
There’s something deeply satisfying about slicing into a homemade pie and seeing that tender, flaky crust hugging the filling beneath. It signals care, tradition, and a little bit of magic in the kitchen. But too often, making pie crust feels intimidating: the fear of tough dough, the worry about shrinkage or cracking, the anxiety of a soggy bottom.
That’s why I’m thrilled to share this approach that simplifies everything. Using your food processor to make crust takes away the guess-work and elevates your pie game without adding stress.
Whether you’re baking for a crowd, bringing something to the table for the holidays, or simply treating yourself to a little indulgence, this recipe gives you a beautiful canvas for whatever pie you dream up.
So grab your processor, gather your ingredients, and let’s make a crust that’s every bit as delicious as the filling you’ll soon be plopping inside.
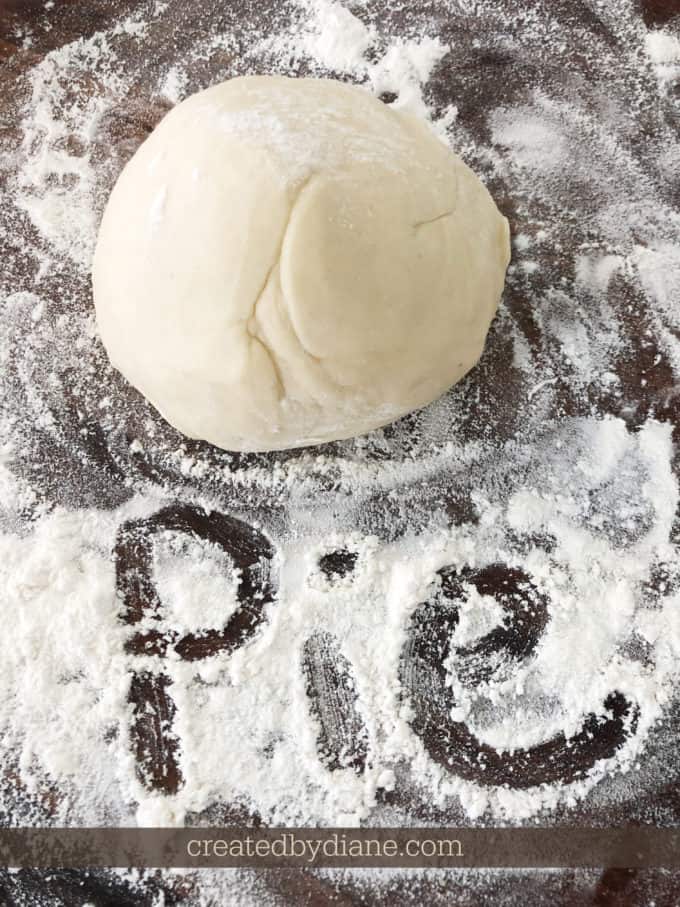
Pie. It’s one of the most simple and delicious desserts that seems more complex than it is. Use my easy pie crust recipe and bake a pie today, it’s sure to put a smile on your face! This simple homemade pie crust recipe is made using a food processor.
Are you ready to take the guesswork out of pie crust?
I’ve been making pies for years.
I recall the first pie I ever made, it was a GLORIOUS Banana Cream Pie, I was young and trying to impress someone.
It worked 🙂
There is something impressive about a homemade pie,
so whether you are making a pie to impress, or just to enjoy.
This post will help you get a perfect pie crust in minutes.
Really!
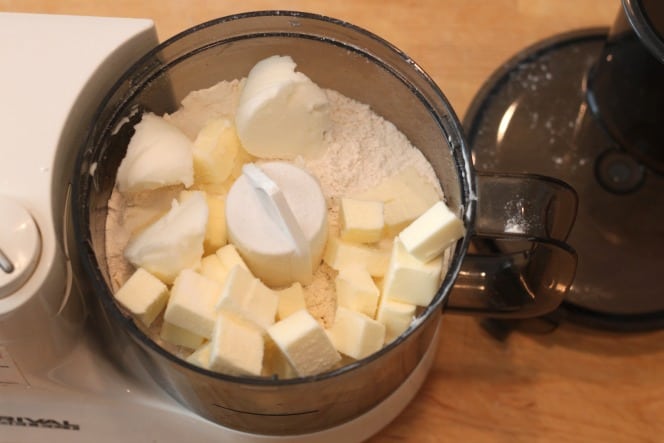
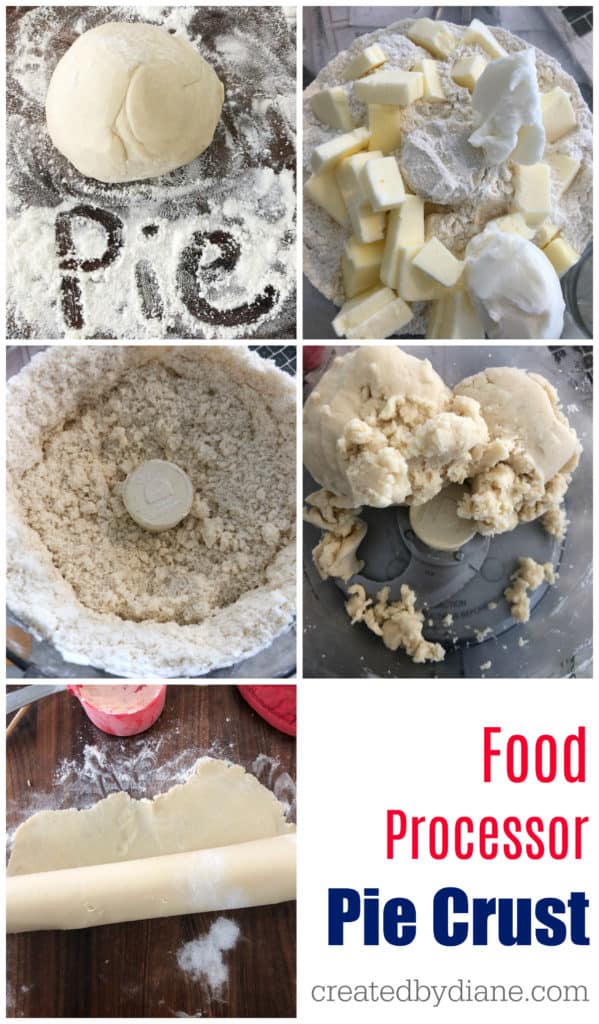
In a food processor add the flour, salt, butter, and shortening.
Pulse it until it’s blended and looks crumbly.
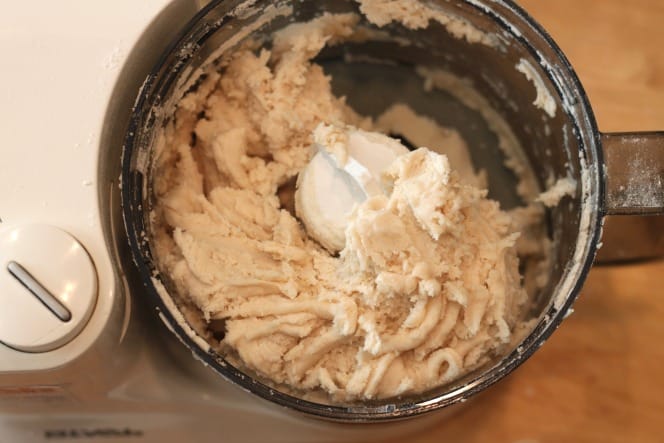
while it’s processing pour in the water and keep mixing until the dough comes together and pulls away from the side all on its own. See the above photo, it’s pulling away. Give it another couple pulses and it’ll pull all away like the photos below.
This is the easiest way to make pie crust!
If the pie crust is a little “soft” add a tablespoon of flour, I find once I roll it out on a floured surface the pie crust is very easy to manage.
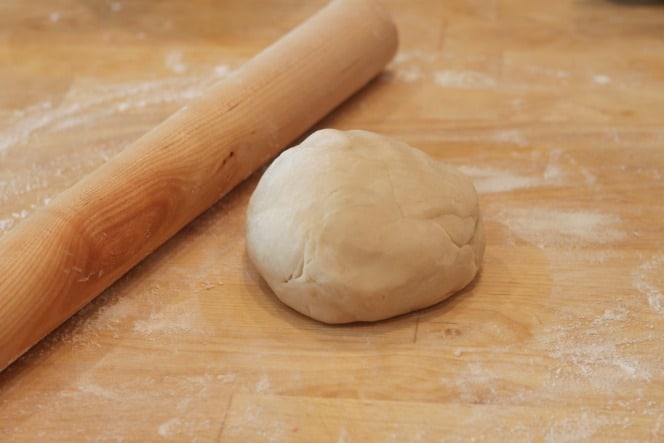
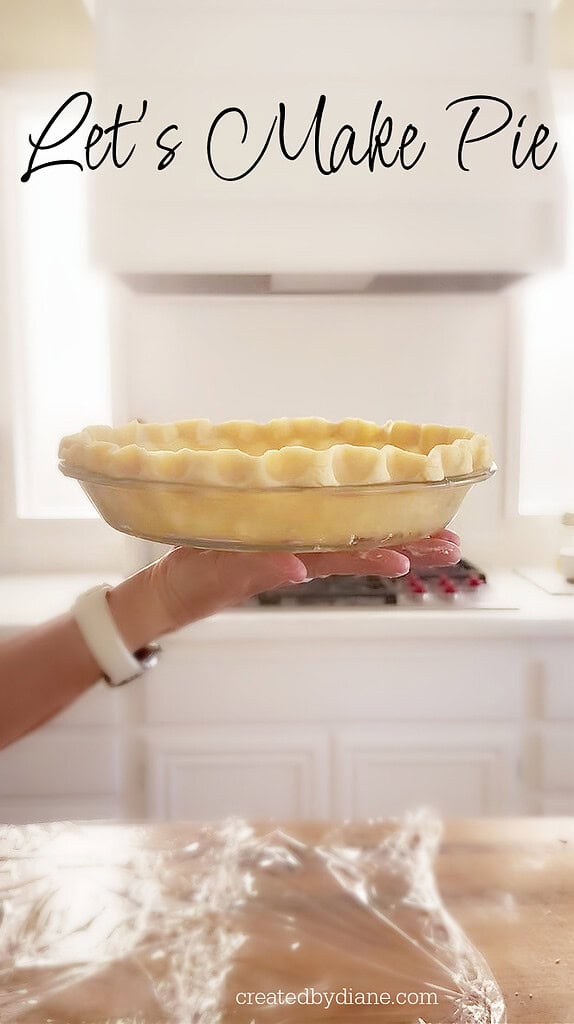
This recipe will make 2 nine-inch pie crusts. Cut the dough in half and roll out one crust at a time on a lightly floured surface.
Roll the dough from the center out to the edges until it’s between 1/8″-1/4″ thick.
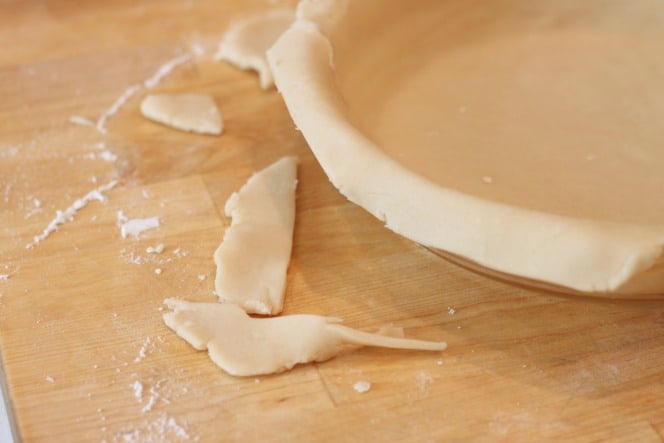
Place the dough into the pie plate (the larger and deeper the pie plate the more crust you will need. Be sure to measure your pie plate.
I have many that are 10 inches by over two inches deep, they need more crust.
Cut off the excess dough so that it’s even all around the pie plate.
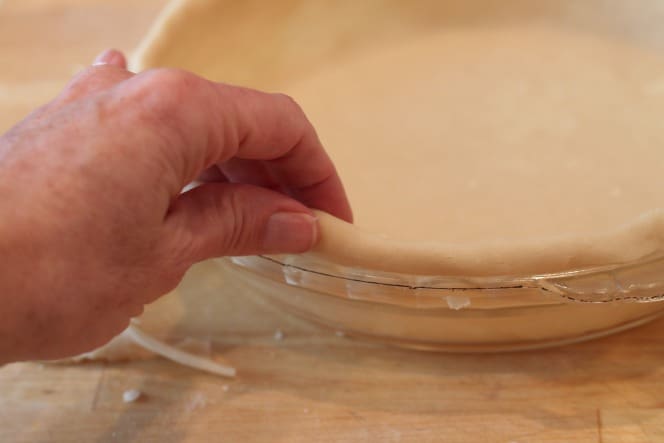
Fold the cut edge under the rim of the pie plate to form a thicker edge.
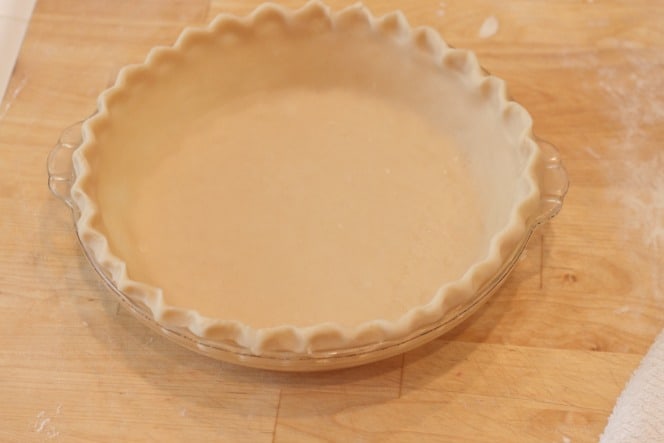
Press the edge between your thumb and two fingers, or use two hands and use one knuckle on one hand and to on the other to flute the edge of the pie crust.
Now that your crust has that charming fluted edge and sits perfectly in the pie plate, you’re ready for the next step: setting the scene for the filling (or for a blind bake, depending on your recipe). Here are some pro tips to ensure your crust bakes flawlessly:
1. Chill the crust before baking. After you’ve rolled it out and fluted the rim, pop the pie plate into the fridge for at least 15-20 minutes (or even up to 30). This will help the butter and shortening firm up again, reducing the risk of shrinking or bubbling as it bakes.
2. Use proper crust protection if needed. If you’re blind baking the crust (no filling yet), line the dough with parchment or foil and fill it with pie weights or dry beans. This keeps the bottom from puffing up and ensures a crisp base.
3. Watch your bake time and temperature. For a fully filled pie, aim for the fill cooks through and the crust edge turns nicely golden. If you’re doing a pudding or cream-pie base, bake the crust alone at a slightly higher temperature (for example, 400°F) until golden, then chill before filling.
4. Add final touches after baking (optional). Once your crust is baked and cooled a bit, you can brush the inside lightly with melted chocolate to create a moisture barrier (perfect for juicy fruit pies), or sprinkle a little cinnamon-sugar along the rim to crisp things up and add flavor.
5. Filling time! With the crust baked (or ready for the raw fill) and the edge looking beautiful, you’re now free to pour in your choice of filling, from classic apple or pumpkin to a rich chocolate espresso pudding. The sturdy, flaky crust you created will hold it all together and elevate the finished result.
And that, friends, is how you go from dough to a beautiful pie base in a matter of minutes—with the confidence to fill, bake, and share with pleasure. Now let’s dive into the filling options and baking steps…
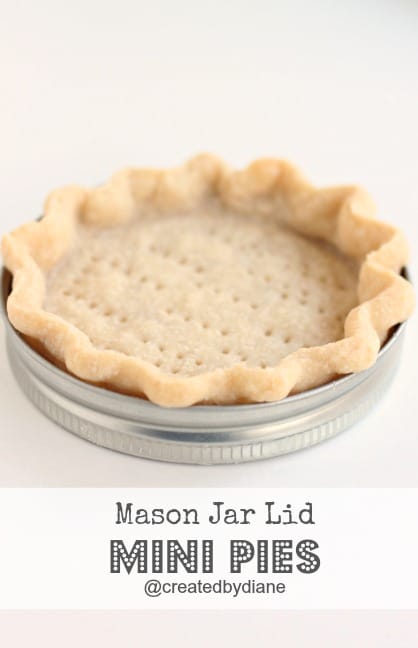
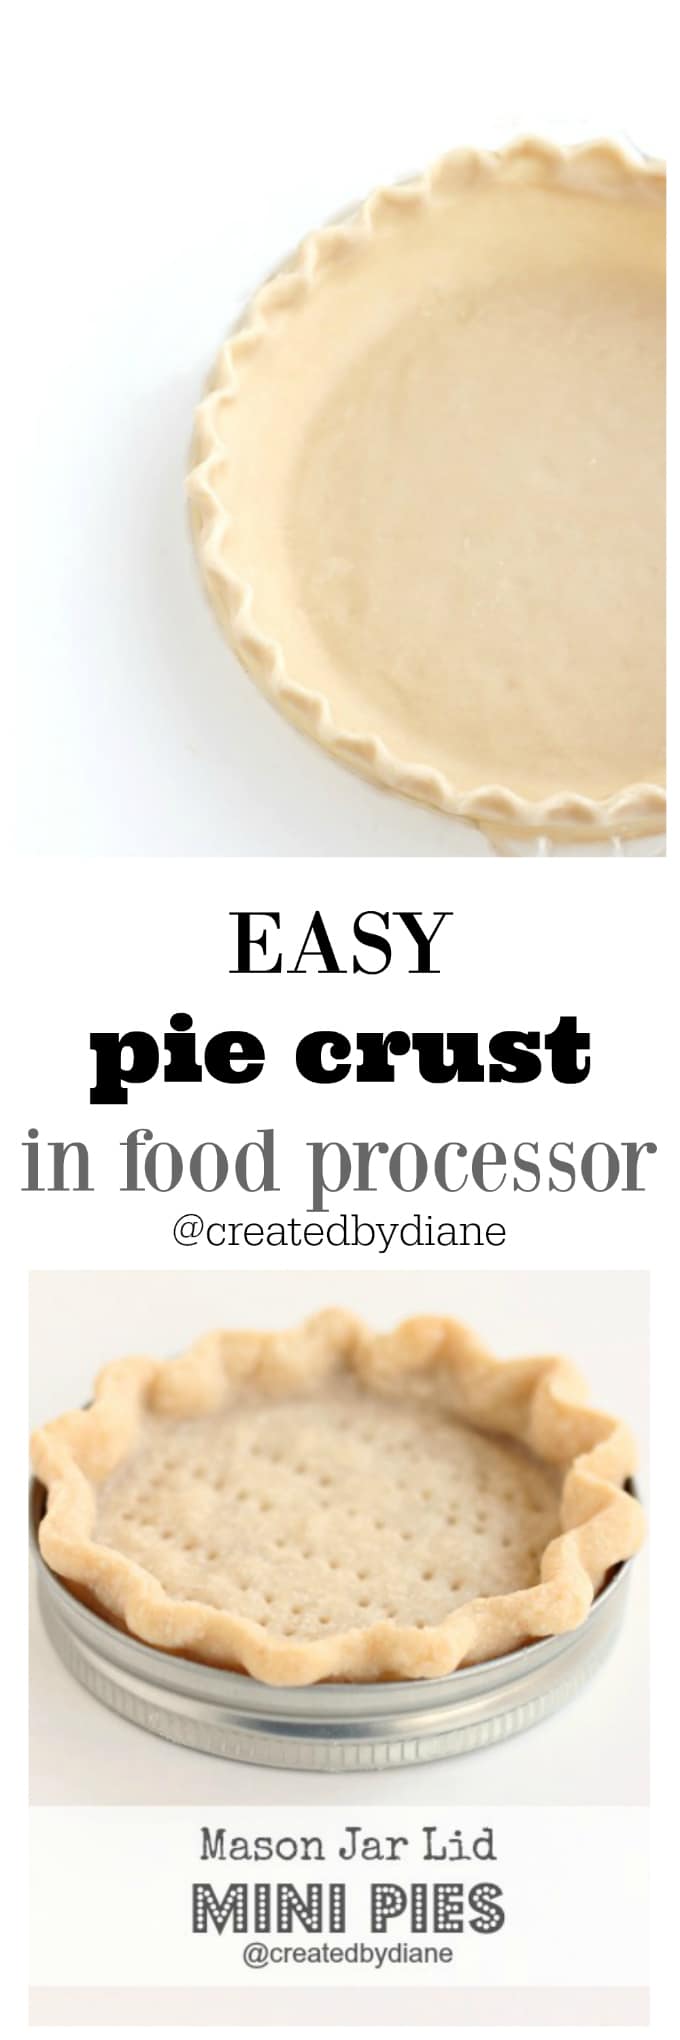
And if you want mini pies, don’t forget to check out my mini jar lid pies… HERE
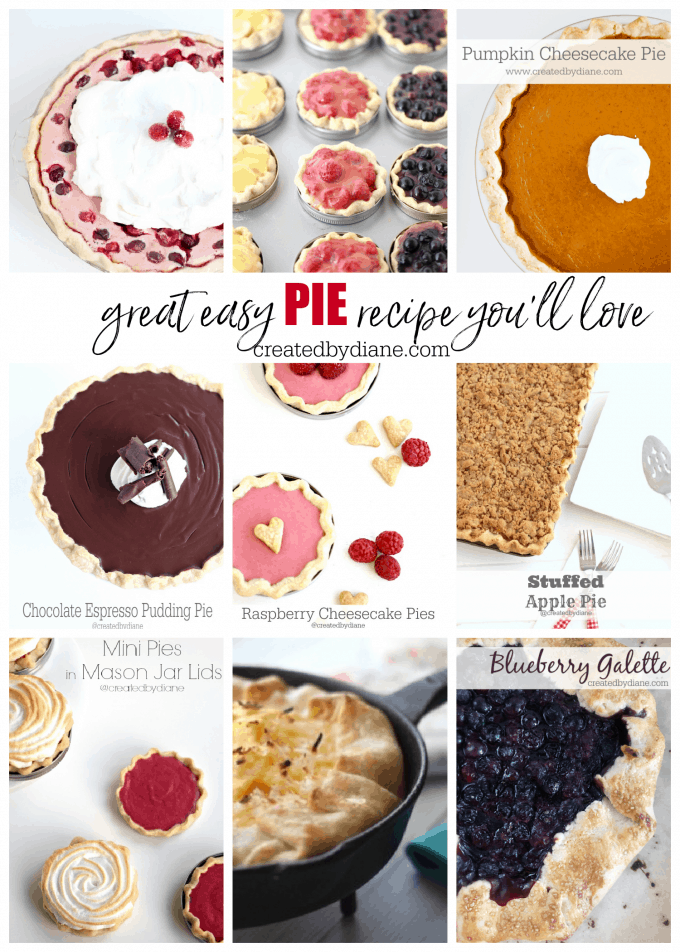
- Cranberry Cheesecake Pie
- Mini Fruit Pies
- Pumpkin Cheesecake Pie
- Chocolate Espresso Pudding Pie
- Raspberry Cheesecake Pie
- Stuffed Apple Pie
- Cranberry Lemon Meringue Pie
- Blueberry Galette
- mini heart shapes pies with jam
Savory recipes with pie crust include Easy Empanadas, Tomato Galette, and Spinach & Goat Cheese Pies.
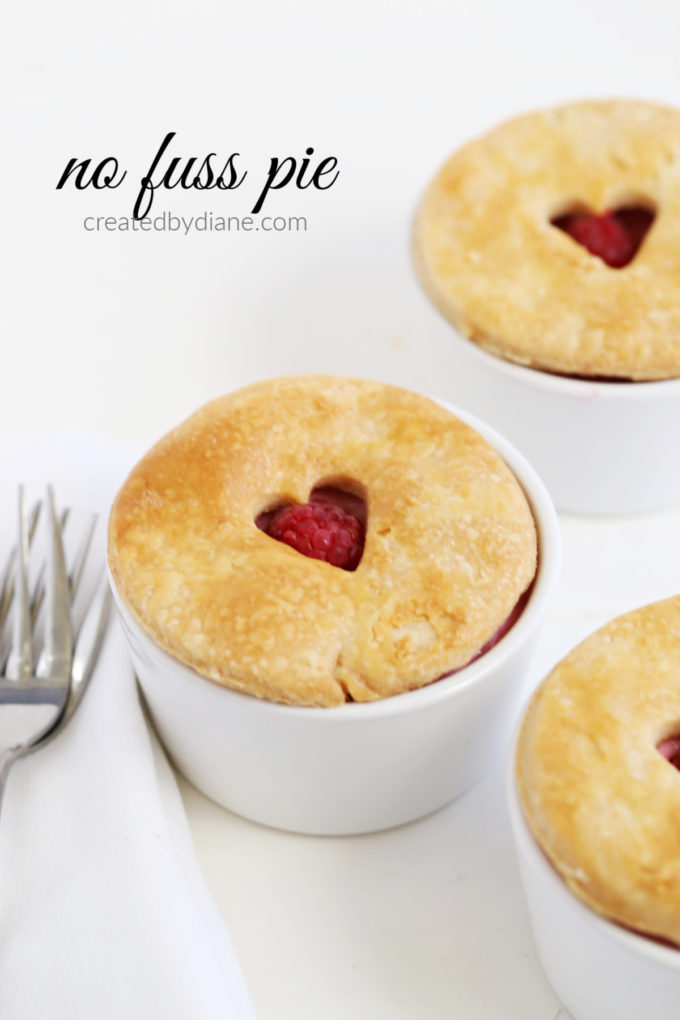
If you love pie but do not want to fuss with fluting the edge, but want a simple pie top… try this.
I cut pie crust into circles, then used a small heart cookie cutter to make the heart shape, after I made this raspberry cheesecake pie filling I poured it into dishes and simply topped it with these baked pie crust rounds.
This recipe makes 2-9″ pie crusts.
Use the pie crusts immediately or cut the recipe into two portions and wrap the pie crusts with plastic wrap in a disk shape and refrigerate 3-4 days in the fridge.

Easy Pie Crust made in a food processor
Ingredients
- 2 cups flour
- 1/2 teaspoon salt
- 3/4 cup cold unsalted butter
- 3 tablespoons shortening
- 1/4 cup ice-cold water
Instructions
- Place the flour, salt, butter, shortening into the food processor and pulse until it forms a crumbly mixture.
- Pour water into the chamber on top of the food processor as it's moving.
- Stop the food processor as soon as the dough pulls away from the side.
- Lightly flour your work surface, pour the dough onto your work surface and roll gently into a ball.
- Cut the ball in two.
- Roll each ball as minimally as possible to prevent the dough from becoming tough and not flaky.
- For two balls of dough and roll each out from the center of the ball of dough to the edges until it's between 1/8"-1/4"
- place the dough into the pie plate and cut the excess dough off and flute the edge.
- Bake crust according to the pie recipe you are making.
- If you want to bake a "blind" pie crust, press a fork into the sides and bottom of the dough so it does not puff up as it bakes.
- Bake at 375 degrees for 15 minutes. If you are going to bake it again.
- If you want a golden pie crust for a pudding pie, then bake it at 400 degrees for 10-12 minutes or until golden.
- Apple pies don't need to be baked ahead of time, they bake for quite some time so just fill the pie crust and bake, or top with a second crust and bake.
- Oh, how I love pie!
Notes

Take a look at my Mason Jar Lid Mini Pies here, perfect for individual desserts! This recipe makes 12 mini pies.
Hello Diane
I just made this crust for blueberry galettes.
How long do I cook this for.
I didn’t blind bake the crust.
The crust for the galette bakes for 25 mintues at 425° with the filling in it.
https://www.createdby-diane.com/2020/07/blueberry-galette.html
Thank you for the recipe, It looks great. Take some time and participate in the talktowendys survey to get a sandwich free.
I love pie and love this great easy way to make the crust, thanks!
I love to try this recipe. I hope it will taste good like yours. Thanks for sharing the details here!
Hi, love your recipes but I have a query- what do you use / call Shortening in this recipe please? Many thanks for your precious time. 🤗
Shortening is the product, Crisco is a brand name of shortening. It’s a solid form of fat. Not sure if it’s a regional barrier. Vegetable shortening is what you will be looking for. I searched for New Zealand equivalent from looking at your email address. Some recommend kremelta, which is coconut derived. I would suggest you search for Vegetable solid shortening and ask what others use in your area.
Self rising or All purpose flour?
all purpose flour
Hi Diane,
I would like to make a lot of the mini pie crust for a reception dinner. Would just the baked pie crust freeze well?
Yes, baked pie crust freezes well. Be sure to thaw them unwrapped so any moisture that collects while freezing won’t soak into pie crust as it’s being thawed.
Is that 3/4 cup butter or ?????
yes it is 3/4 cup butter, sorry I had an extra / in there and didn’t realize my typo, I adjusted the recipe to reflect the change
Hi Diane. I love your recipes 🙂 I need to serve a dairy free dinner. Can I substitute margarine for butter? I know Fleishman’s brand is dairy free.
I’ve never used it, but it’s worth a try. I’d love to hear how it turns out. I have an all shortening recipe for pie crust that is great too. Here is a link to that recipe https://www.createdby-diane.com/2014/09/stuffed-apple-pie.html
i have been a baker for over 20 years and have yet to perfect a pie crust. I will give this a try, if it doesn’t work I will go back to using premade pie crusts. It frustrates me because my baked goods are always a rave wherever I take them but I can’t master a simple pie crust. I’ve tried a variety of recipes and different rolling pins and just can’t pull it off. Ugh!
I’ll definitely have to try this procedure. You make it look so easy.
Beautiful post — I always make my pie crust in a food processor but my crimped edges NEVER look as good as yours!
That looks gorgeous! I’ve been using the Serious Eat’s science of pie recipe made in the food processor and it’s been working but it’s a teensy bit more effort than this. I’ll try yours today. I have the butter all chopped up!
I hope you like it, I made four this week, and knew I needed to blog it. I have many varieties of pie crusts, some I like for specific pies, this is an all purpose pie curst, soft but not floppy all butter tends to be fussier especially since I live where it’s warmer 🙂