How to make Mini Baked Alaska
If you like Baked Alaska you are in for a real treat… this is the easiest and most perfect baked Alaska, personal size, you can make as many as you’d like or just a couple of them.
One of the best parts about mini baked Alaskas is you can make them and keep them in the freezer for any time snacking…
to serve after dinner, everyone will give them rave reviews!
If they last long enough you can have one for the perfect midnight snack, knowing it’s in the freezer may even wake you up in the middle of the night thinking about it!
They won’t last long, trust me, they are so delicious.
Show off your culinary skills with this baked Alaska. It may look intimidating, but I assure you after I walk you through the steps, you’ll wonder why you stressed so much. Ice cream, graham cracker crumbs, and meringue come together to make a tasty treat, satisfying all your sweet tooth demands. It’s sweet but not too sweet, offering a creamy, dreamy dessert to impress any guest. Or just impress yourself and enjoy a relaxing night at home.
But where did this dessert come from? Traditionally served with a sponge cake layer, the earliest mentions of this dessert go back to 1802. It was Thomas Jefferson’s physicist who came up with the idea to use egg whites to encase ice cream. He was successful and called the dish ‘omelet surprise’. From there it made its way into cookbooks and across the sea to France. It’s gone by a few different names but is most commonly referred to as Baked Alaska.
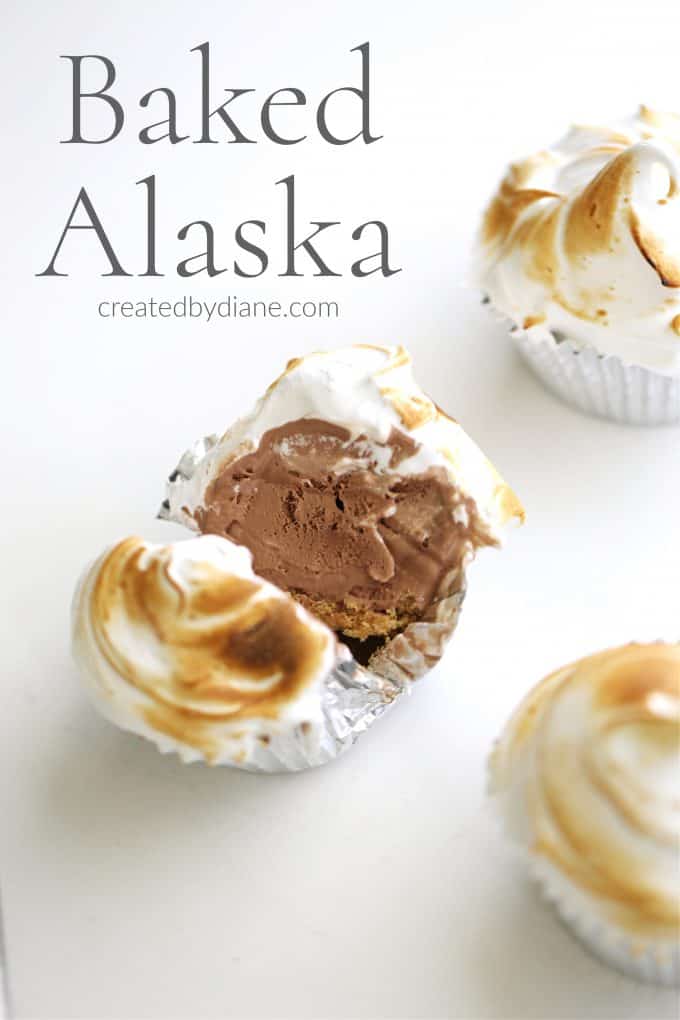
For these sweet little “cupcakes”, I’ve replaced the sponge cake with graham cracker crumbs, which adds a nice crunch and slightly sweet ‘crust’. The meringue isn’t at all dry or crumbly, nor is it chewy. Instead, it is light and silky and adds a nice contrast to the thick and creamy ice cream.
And if you’d rather have one big baked Alaska, I have that as well! My Simple Baked Alaska is the large version of these darling little cupcakes. It makes a big impression when it comes to the table. It’s just perfect for celebrating birthdays, anniversaries, or anything really!
Let’s look at our baked Alaska cupcakes…
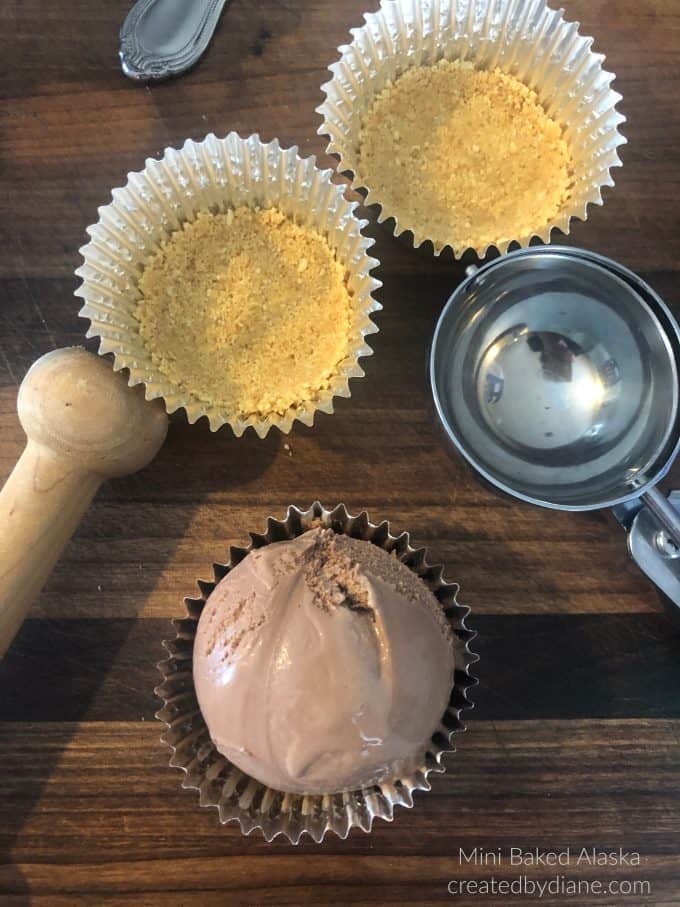
To begin, line 6 portions of a cupcake pan with foil cupcake liners.
Next, melt butter and mix with graham cracker crumbs. Press 2 tablespoons of the mixture firmly into each compartment of the cupcake-lined pan. Set aside.
Prepare the meringue by bringing the sugar and water to a boil in a saucepan until it reaches 240°. Set aside to cool slightly.
In the bowl of a mixer, whip the egg whites until it forms soft peaks.
Slowly drizzle the syrup into the whipping egg whites until all the syrup is completely added (be sure not to pour it all in at once or you will kill the meringue).
Continue to whip the mixture until the bowl is cool and the meringue is at room temperature, it should create firm peaks when it’s ready.
Pull the ice cream out and allow it to sit out at room temperature for 5 minutes so it’s easy to scoop.
Place 4 tablespoons of ice cream (any flavor you’d like, I used chocolate) into each cupcake liner on top of the graham cracker mix.
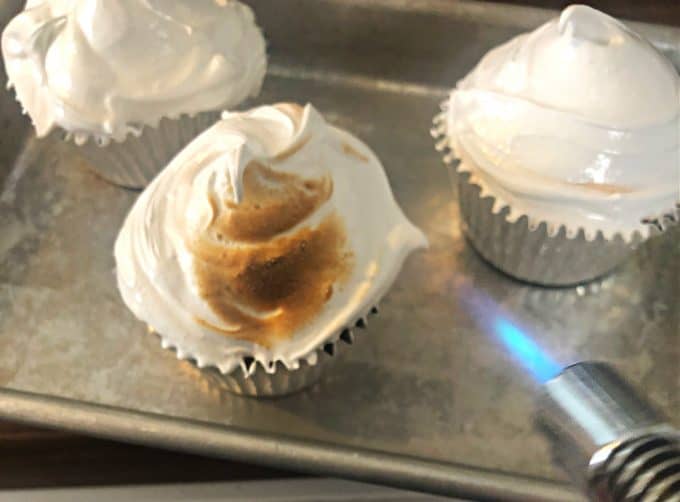
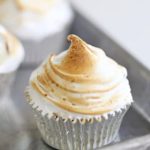
Then spoon on the meringue and swirl it around the top to create a swirl. Get creative!
Finally, use a kitchen torch to toast the meringue or place it under the broil for 2 minutes.
Store in the freezer until ready to serve. Can be stored frozen for 3 days.
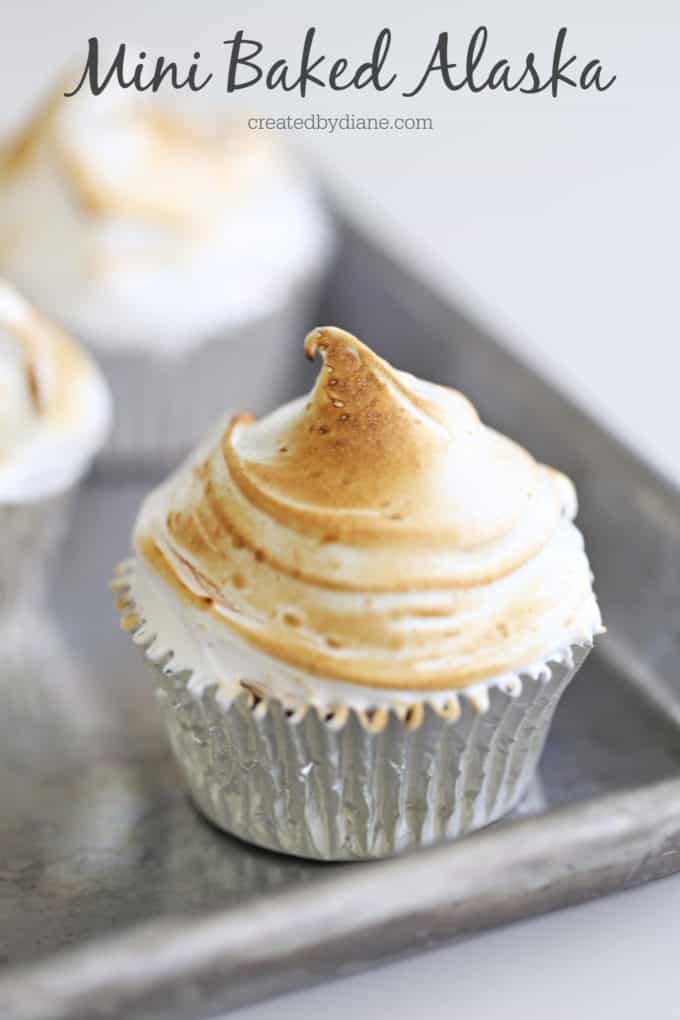
These are individual sized made in a cupcake pan, making them the perfect size.
made in aluminum foil cupcake liners,
they work out very well and won’t burn when you torch the meringue.
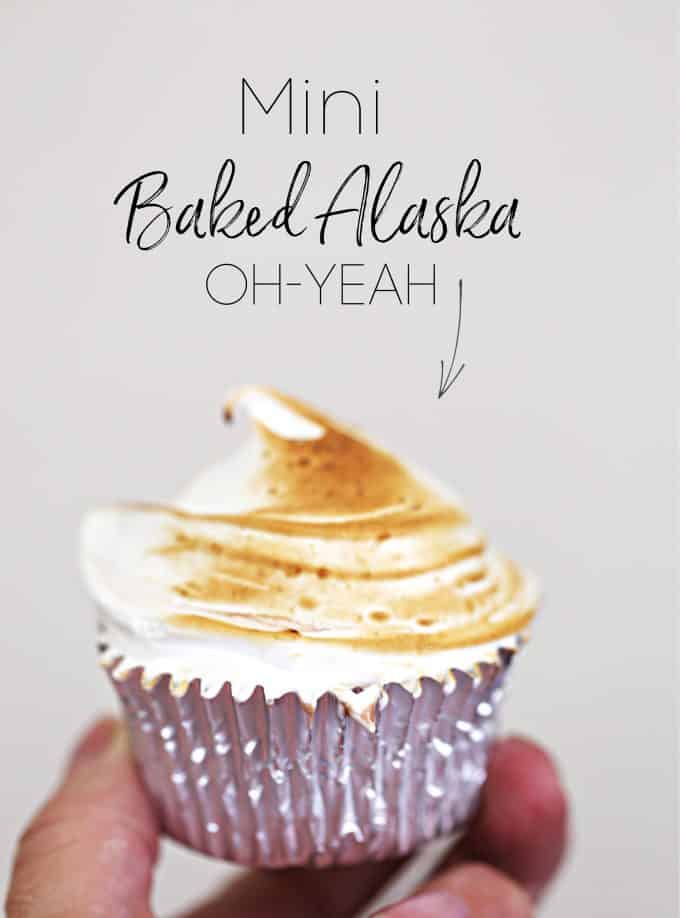
Toasted meringue is so delicious firm and toasty, then creamy inside… always a winner.
This meringue is so delicious, it’s Italian Meringue, soft and slightly sweet.
One of the best parts about mini baked Alaskas is you can eat one without sharing, unlike the typical larger baked Alaskas! I made a sharing size of Baked Alaska for 2 not too long ago perfect for sharing with a loved one.
These cute little baked Alaskas are not only great to serve after dinner, but they can also be really fun for every day celebrating. Everyone will give them rave reviews, trust me.
Oh, and they make a perfect midnight snack, knowing it’s in the freezer may even wake you up in the middle of the night thinking about one of these.
ANOTHER great recipe using Italian Meringue is this S’more Cake, it’s a single layer 8″ round cake, which is nice for smaller celebrations!
How will I know if my peaks are stiff enough?
Stiff peaks will be tall and firm. When you remove the mixer, they will stand at attention and not droop down.
I don’t have graham crackers, any suggestions?
You can use any cookie you’d like. If you have Oreos, peanut butter cookies, vanilla wafers, or similar, you can crush these up and they would make an excellent stand in!
Can I use carton egg whites?
Carton egg whites do have chemical stabilizers to keep the eggs from going bad. Most will state on the packaging that it doesn’t work well for meringues.
I have loads of other sweet treats that you can sink your sweet tooth into!
- Mexican Hot Chocolate Cupcakes – A dash of cayenne and cinnamon make your tastebuds dance while satisfying that need for chocolate!
- Easy Peanut Butter Sandwich Cookies – Rich and delicious. They are the perfect accompaniment to a tall glass of milk, or steaming mug of coffee.
- Stuffed Apple Pie – Also called Sour Cream Apple Pie, this pie is filled with tart apples, vanilla, and sour cream. Topped with a crumb topping, this pie is tangy and sweet.
I have a recipe for every kind of sugarholic!
Mini Baked Alaska
Ingredients
- 3/4-1 cup graham cracker crumbs 2 tablespoons for each
- 2 tablespoons butter melted
- 2 cups ice cream 1/4 cup for each I used chocolate
Italian meringue
- 3/4 cup granulated sugar
- 1/4 cup water
- 2 egg whites from large eggs
Instructions
- Line 6 portions of a cupcake pan with foil cupcake liners.
- Mix the graham cracker crumbs with the melted butter and press firmly 2 tablespoons into each compartment of the cupcake-lined pan.
- Prepare the meringue by bringing the sugar and water to a boil in a saucepan until it reaches 240°.
- In the bowl of a mixer whip the egg whites until it forms soft peaks.
- Slowly drizzle the syrup into the whipping egg whites until all the syrup is added (be sure not to pour it all in at once).
- Continue to whip the mixture until the bowl is cool and the meringue is at room temperature, it should create firm peaks when it's ready.
- Allow the ice cream to sit out at room temperature for 5 minutes so it's easy to scoop
- Place 4 tablespoons in each cupcake liner on top of the graham cracker mix.
- Then spoon on the meringue and swirl it around the top to create a swirl.
- Use a kitchen torch to toast the meringue or place it under the broil for 2 minutes.
- Store in the freezer until ready to serve. So that everything stays firm.Meringue is best fresh, so add it just before serving for best results, then toast and serve. When put together, it can be stored frozen for 3 days. But as mentinod meringue is best fresh,
Can I just bake in oven without using broil for cupcake
baking often won’t brown the meringue but instead melt the ice cream and meringue to a “soupy mess”. You want tho use a hot broiler to brown it from the top or use a kitchen torche.
Thanks for recipe
If I freeze for a couple of days
Do I freeze ready to serve with meringue kitchen torch to toast the meringue or place it in the oven?or is it better to add meringue and torch just before serving. 💛🦋
Meringue is best fresh, so add it just before serving for best results then toast and serve.