
How to Perfectly Roast Pumpkin Seeds
If you’re looking for the best way to make crispy, crunchy roasted pumpkin seeds, you’re in the right place! This easy method shows you exactly how to perfectly roast pumpkin seeds so they turn out deliciously crispy every time.
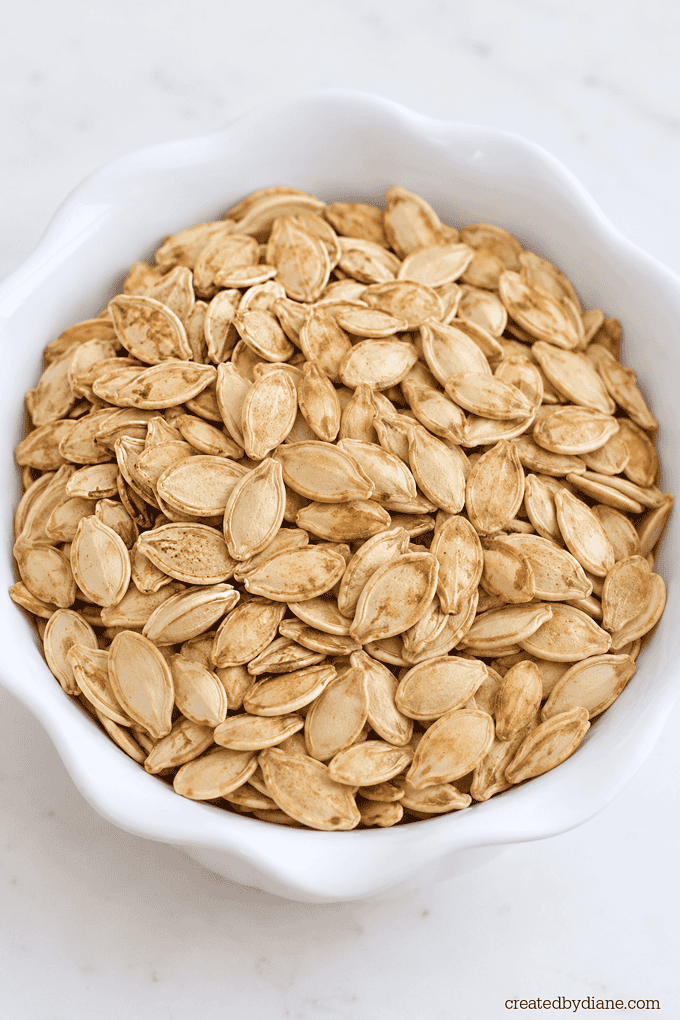
I also have a simple TIP that makes them extra crispy, giving you the best results without any guesswork. Once you try this method, you’ll want to save those pumpkin seeds every time you carve a pumpkin!
And there’s a video to check out too!

I’ll share the exact time and temperature I use, along with my secret method for making perfectly crispy roasted pumpkin seeds. No more soft, chewy, or soggy seeds!
Every fall, we carve pumpkins for Halloween, but what do you do with all those pumpkin seeds? Toss them in the trash or save them for a delicious, crunchy snack? I’m here to show you why saving them is worth it!
Today, I’m sharing my tried-and-true method for roasting pumpkin seeds so they turn out crispy and delicious. And the secret to getting that perfect crunch starts before they ever go into the oven.
Ready to find out how?
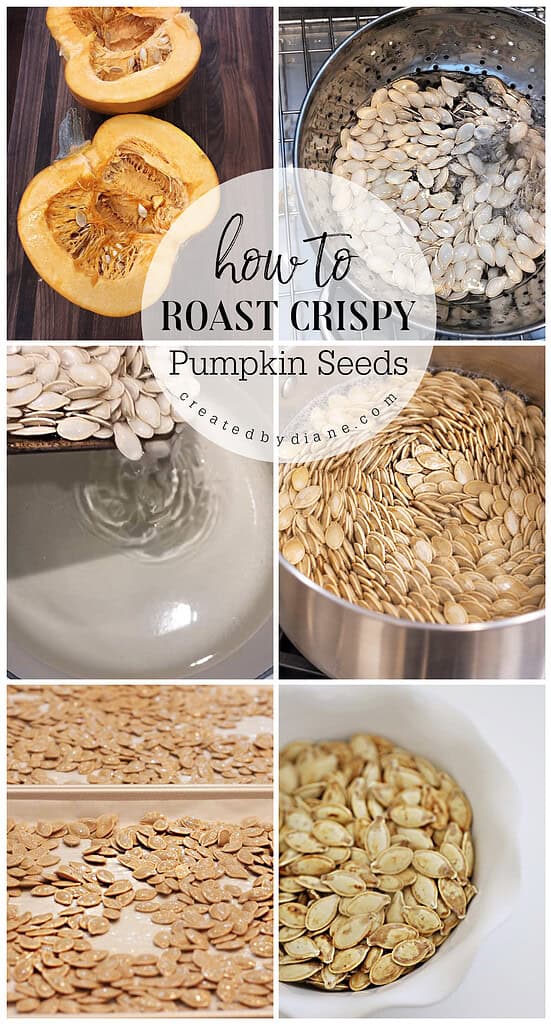
Grab your pumpkins, get carving, and scoop out all those seeds. Separate the seeds from the stringy pumpkin pulp, give them a good rinse, and get ready for the step that makes all the difference.
You’re going to boil the pumpkin seeds first!
That’s right! Before roasting them in the oven, you’ll boil the seeds in water. This simple extra step is my secret to getting that extra-crispy texture you’ll love.

The result? Extra-crispy roasted pumpkin seeds that are so delicious, you might want to hide them from everyone and keep them all to yourself!
Once you try this method, you may never go back to simply baking pumpkin seeds. Boiling them first partially cooks the seeds, helping them roast up beautifully in the oven for that extra-crispy crunch. It’s a simple step that makes a big difference!
If you love pumpkin-themed dishes, you might also enjoy this one or this one. I especially love filling one with candy corn during the fall for a fun, festive touch!

Start by cleaning your pumpkin seeds, and really take your time with this step! Remove as much of the stringy pumpkin pulp as possible and rinse the seeds well.
The cleaner your pumpkin seeds are, the crispier they’ll be! Any leftover pumpkin pulp can keep the seeds from roasting as evenly, so don’t rush through this part.
You’ve taken the time to scoop, clean, boil, and roast those seeds, so let’s make sure all that effort pays off. The last thing you want is a batch of soggy pumpkin seeds when you’re looking for that perfect crunch!

Place the cleaned pumpkin seeds in a pot and cover them with water. Bring the water to a boil, and watch the seeds swirl around in the pot. I think they look so pretty dancing around in the bubbling water!
As the seeds boil, you may notice a few little pieces of pumpkin pulp floating to the surface. If you spot any, simply skim them off with a slotted spoon. This is a great time to remove any leftover bits you might have missed while cleaning the seeds.

In a bowl, toss the seeds with a little olive oil and sea salt, making sure they’re lightly coated.
Want to add a little extra flavor? Now is the time! You can keep them simple with salt or try adding cayenne pepper for a little heat, garlic powder for a savory flavor, or onion powder for extra flavor. Customize them however you like!
Next, spread the seasoned pumpkin seeds in a single layer on baking sheets. I had about 6 to 7 cups of seeds, so I used two half-sheet pans lined with parchment paper.
Here’s another tip for crispy pumpkin seeds: Don’t overcrowd the pans! The seeds need room to roast evenly, so avoid piling them up or letting them overlap too much. Spreading them out in a single layer helps them dry out and get that delicious crunch.

Your pumpkin seeds are ready! You’ll hear a little crinkly, crispy sound when you move them around on the baking sheet. That’s a great sign that the seeds have dried out and roasted nicely.
Let the seeds cool a bit, then taste a few to check the seasoning. Add a little more salt if needed, and then hide them… I mean, enjoy them! They’re crunchy, salty, and hard to stop eating once you start.
If you love all things pumpkin, be sure to check out my Pumpkin Ebook! It’s filled with delicious pumpkin recipes you won’t want to miss, perfect for baking and cooking all season long.
Pumpkin seed favors:
1. Classic Salted– Toss with olive oil or melted butter and sea salt.
Keep it simple, crispy, and addictive.
2. Garlic Parmesan– Mix seeds with olive oil, garlic powder, grated Parmesan, and a little salt. Roast until golden for a cheesy crunch.
3. Ranch– Add a sprinkle of ranch seasoning (store-bought or homemade mix of dried dill, garlic powder, onion powder, and salt).
4. Chili Lime– Toss with chili powder, lime zest, and a squeeze of lime juice after roasting. Add cayenne for extra heat
5. Everything Bagel– Mix with a drizzle of oil and “everything bagel” seasoning for that salty, garlicky crunch
6. Cinnamon Sugar– Toss with melted butter, sugar, and cinnamon before roasting. Try brown sugar for a caramelized touch.
7. Maple Spice– Mix with maple syrup, pumpkin pie spice, and a pinch of salt. Roast low and slow so the syrup caramelizes without burning.
8. Honey Vanilla– Coat with honey, a splash of vanilla extract, and a bit of sea salt for balance.
9. Churro Style– Add sugar, cinnamon, and a pinch of nutmeg, then toss in melted butter after roasting.
10. Spicy BBQ– Combine BBQ seasoning, smoked paprika, and a little brown sugar for sweet heat.
11. Curry or Turmeric- Toss with curry powder, turmeric, and olive oil for a warm, earthy flavor.
12. Buffalo– Mix roasted seeds with a bit of melted butter and hot sauce for a snack with a kick.
13. Taco Seasoned– Use a blend of cumin, chili powder, and paprika for a Tex-Mex twist.
Tips for Mixing Flavors
Base: Start with clean, dry seeds tossed in 1–2 teaspoons of oil per cup of seeds.
Add seasonings: Mix before roasting for dry spices or after roasting for wet ones like honey or hot sauce.
Roast time: 325°F for about 25–30 minutes, stirring halfway for even browning
Keep scrolling after the recipe- there is a lot more info you won’t want to miss.
Check out more of my videos HERE!
Be sure to sign up to get my emails, you won’t want to miss them!

how to perfectly roast pumpkin seeds
Ingredients
- seeds from a pumpkin 4-6 cups
- water
- sea salt
- olive oil
Instructions
- Clean pumpkin seeds and throw out all pumpkin residue.
- Soak pumpkin seeds covered in water and swish around until all loose particles float and scoop them off and discard.
- Just when you think you’ve rinsed them enough, place them on a baking sheet and sort through them to remove any more pumpkin pieces or residue.
- This takes time, but the cleaner the pumpkin seeds are the nicer they will look and the crispier they will bake up.
- Preheat oven to 325 degrees. ( you will bake them after you boil them)
- Place pumpkin seeds into a saucepan and cover with water and a teaspoon salt and bring to a boil.
- Reduce heat and cook on at a medium-low temperature for 10 minutes.
- Strain seeds and then place seeds in a bowl with a teaspoon or two of olive oil to lightly coat the seeds and sprinkle them with salt.
- Pour them out onto a baking sheet(s) in a thin layer.
- Bake for 25-30 minutes tossing them every 10 minutes and being careful not to brown them.
- Test the pumpkin seeds to check for doneness.
- They should be dry, crisp and the inside seed should not be brown, it should be a green color.


You’ll find my ROASTED PUMPKIN RECIPE HERE, which is to make after you roasted the seeds. So SAVE your pumpkin don’t throw it away, there is plenty to enjoy!

I look forward to roasted pumpkin seeds each year.
Some years I buy extra pumpkins just so I can roast seeds!

If you LOVE pumpkin as much as me I have a GREAT PUMPKIN EBOOK for sale for $5. it’s full of pumpkin recipes you’ll make all year long!
You heard me right, just be sure to have some canned pumpkin on hand and all year long you’ll be enjoying delicious pumpkin recipes.

CLICK HERE to see my post for these Halloween and Fall Recipes.
Hope you all have a GREAT Halloween and enjoy snacking on crispy pumpkin seeds. That is until you start snacking on some Halloween candy…if you haven’t already.

Sorry if I missed this but wondering if you had a suggestion: I always slow cook my squash, (so not a giant pumpkin, more like butternuts, kabkchas and butterkins, etc). Because it is already cooked do you think I should reduce boiling time?
I have been stashing seeds from my slow-cooked squashes in the fridge and I finally have enough to make a batch and I am excited to try!
Thank you.
I’m not sure, you could try a few in the oven first before baking the whole batch to see if they turn out the way you’d like.
Why do you simmer the pumpkin seeds for 10 minutes? What’s the purpose of boiling it?
Boiling the pumpkin seeds make the outer shell easier to digest and when roasted make them crispier.
Wonderful recipe, thanks so much. I can’t wait to get your emails, I just signed up.
I tried your recipe and instructions. Best ones I’ve ever made!!! Love this method.
Oh my. These are so addictive. I wanted my a little browner, so I left them in for 35 minutes, checking them every 5 minutes. I will definitely make these a new fall cooking tradition.
Thank you so much for recipe.
Happy fall y’all.
So delicious! I will be roasting pumpkin seeds every year now, not to mention it made the kitchen smell so good as they were roasting in the oven!