
Homemade Peanut Butter Dog Bones
These homemade peanut butter dog bones are an easy treat to bake for the dogs in your life. They’re made with simple ingredients, rolled out and cut into cute little bone shapes, then baked until firm.
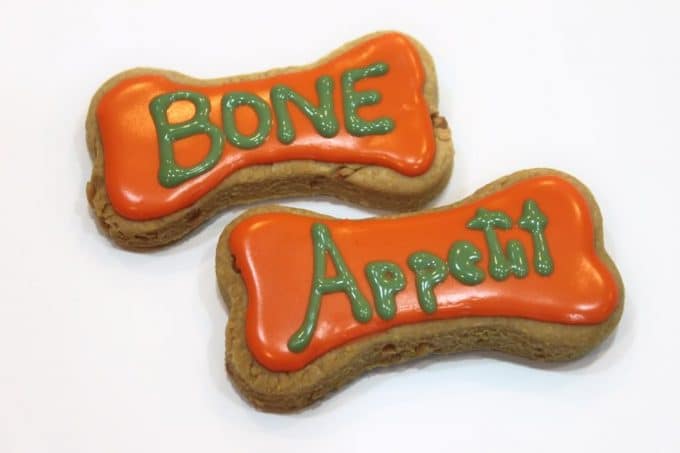
And yes, I made a LOT of them.
We didn’t actually have a dog at the time I made these. My daughter loved dogs so much that she spent her time walking and caring for dogs in our neighborhood. She decided that all of her canine friends needed homemade treats, so naturally, I baked them some.
She loved giving these homemade peanut butter dog treats to all the dogs she cared for, and they seemed pretty happy to be the taste testers.
From Boxers and Shih Tzus to Jack Russells and Labradors, there were plenty of happy dogs waiting for a treat.
Why make homemade dog treats?
Making homemade dog treats is a fun way to spoil your favorite dog, and you can make a whole batch at once.
These peanut butter dog bones are especially cute when cut with a small bone shaped cookie cutter. I made about 30 three inch treats from this recipe.
You can leave them plain or add a simple dog friendly icing for a little extra decoration.
Ingredients
• Flour
• Cornmeal
• Eggs
• Milk
• Baking powder
• Peanut butter
I used crunchy peanut butter when I made these, but creamy peanut butter will make the dough easier to roll out.
Important: If you’re making these for dogs, always check your peanut butter label and make sure it does not contain xylitol or other ingredients that are unsafe for dogs.
How to make homemade peanut butter dog bones
- Preheat the oven to 375°F.
- Combine the flour, cornmeal, eggs, milk, baking powder, and peanut butter to form a dough.
- Roll the dough out on a lightly floured surface.
- Use a bone shaped cookie cutter to cut out the treats.
- Place the dog bones on a baking sheet.
- Bake for about 15 minutes, or until the treats are baked through and firm.
- Let the treats cool completely before decorating or giving them to your dog.
Easy icing for dog treats
If you want to decorate the dog bones, you can make a simple icing with powdered sugar and water.
Mix:
• 1 cup powdered sugar
• 2 teaspoons water
Add the water gradually until you reach a consistency that’s easy to pipe onto the cooled treats.
The icing isn’t necessary, but it’s fun if you’re making these as homemade gifts for your dog’s friends.
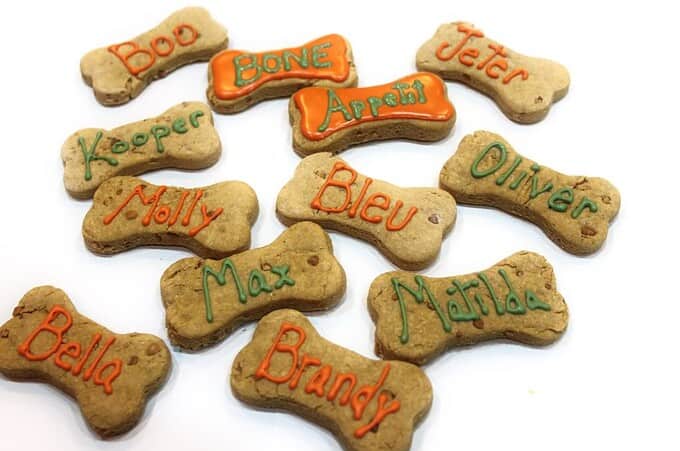
My daughter used the icing to personalize some of the treats with the dogs’ names.
How to store homemade dog treats
These homemade treats don’t contain preservatives, so I recommend freezing them if you’re not going to use the entire batch within a few days.
You can keep a small amount in the refrigerator for a few days and freeze the rest for longer storage.
I love the idea of keeping them in the freezer and giving one to your dog when they’re ready for a special treat.
Homemade Peanut Butter Dog Bones
Ingredients
- 3 cups all purpose flour
- 1 cup cornmeal, can use flour for this cup is desired
- 2 large eggs
- 1 cup milk
- 1 teaspoon baking powder
- 1 cup peanut butter creamy or crunchy
icing
- 1 cup powdered sugar
- 2 teaspoons water, add more if needed, but you'll want it thick if you are writing names
- food coloring
Instructions
- In the bowl of a mixer, add the ingredients and mix on medium until well blended.
- Roll out the dough on a floured surface and cut with a bone shaped cookie cutter.
- Bake at 375 degrees for 15 minutes. Allow them to cool completely before adding icing.
- Mix powdered sugar and water and use food coloring, mix well until smooth, place in a piping bag to be able to easily write names on treats, or use a spatula and spread icing over the tops of the dog bones.
It was a cute way for her to deliver these to all her canine friends. These are only a portion of them. My son said we should call this recipe “Bone Appetit”.
I love it!
What a fitting name.
Wow these are easy to mkae and my dogs just loved them and I had plenty to give to my friends dogs too!
I made your Peanut Butter Biscuits and my dogs love them. What is the storage requirements, do they need to be refrigerated or frozen since they won’t be consumed right away?
I store them in the freezer since they don’t have preservatives, my dog likes knows exactly when I open the freezer he can have one 🙂 In the fridge for a few days works but if you are keeping the whole batch I’d freeze them.
On the icing what did you use for the color? cant wait to make these for my 5 furbabies with their names on them
I made the icing with powdered sugar and water, mixed to a consistency to pipe it on with a piping bag to write the names. Here is the recipe I now use on cookies and can be made for the dog treats too. https://www.createdby-diane.com/2012/01/how-to-ice-cookies-without-a-a-piping-bag-icing-the-easy-way.html and it easy to coat the cookies that way without piping all of them.
I’m sure your furry friends will LOVE them.
You may also get a kick out of the Pet friendly cakes I’ve made here https://www.createdby-diane.com/2013/01/how-to-make-a-no-bake-cake-for-you-cat-or-dog.html
~Diane
I used Americolor Food Coloring.
Those look like awesome treats! I have never been “brave” enough to try puppy-icing (other than some carob drizzle), but will have to give it a try – that looks great. I shared your link in the round-up at https://creativityunmasked.blogspot.com.au/2012/08/cupcakes-and-pupcakes.html 🙂
I am going 2 make some of these bones my dog loves …..Peanut Butter