How to make a stencil for decorating the top of a cake!
Let’s have fun with sprinkles… and decorate the top of a cake.
How to make a stencil for decorating the top of a cake.

How to make a stencil for decorating the top of a cake.
Need a quick and easy way to decorate a cake.
I think this tip will make your next cake look great! I know this cake lots of compliments on how cute it was. The best part it was easy.

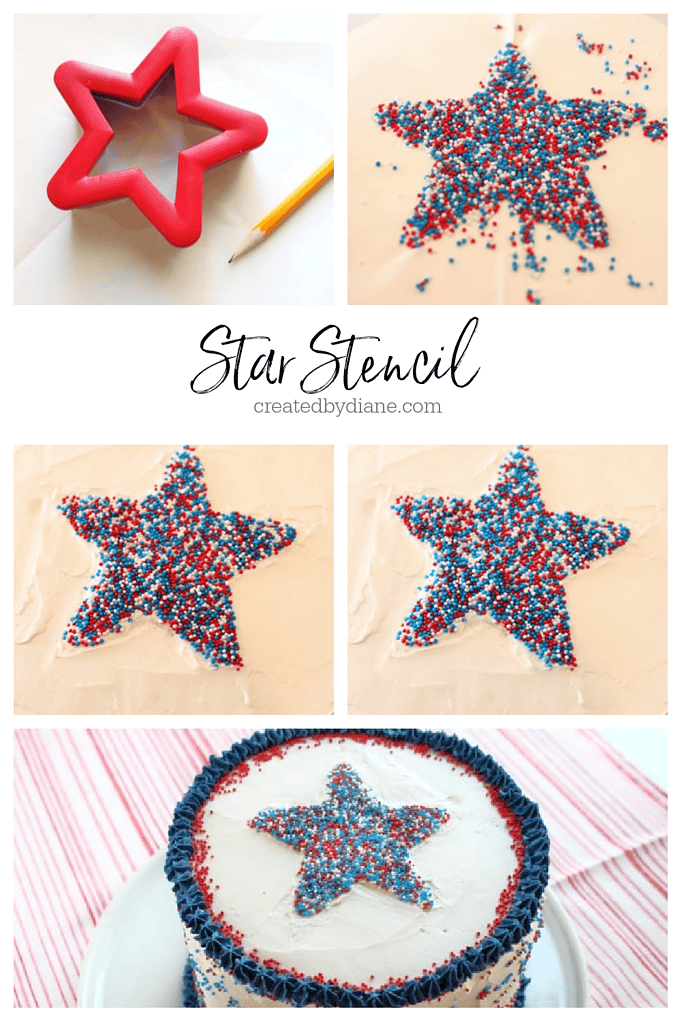
It all started with a star cookie cutter.
Of course you can cut a star out of cardboard, or draw a star, or any simple shape for that matter.
Make a stencil with a star cookie cutter on wax paper.
Trace the outside of cookie cutter onto a piece of wax paper.
Cut out the star. If you fold the wax paper in 1/2 and place the cookie cutter centered on the fold, it will make it easy to cut out.
Place the cut out wax paper with the star cut out onto an iced cake.

Add sprinkles to the cut out area, I used red, white and blue nonpareils.
Press the sprinkles gently into the icing so they stay within the star shape. Dust off the excess sprinkles before removing the wax paper so they don’t go onto the icing.

Carefully remove the wax paper. Fix any misplaced sprinkles with a toothpick.

Spread any icing that isn’t smooth with a small offset spatula.

To finish the cake pipe blue frosting on the edge with a star tip and add more red nonpareils. Re-smooth sides of cake and toss more nonpareils onto the frosting so they stick, then pipe the blue edge at bottom of cake.
You can find the rest of the Red, White and Blue Cake instructions HERE.
It’s summer and I’m heading outside to enjoy 🙂 Hope you are enjoying your summer and found this tip helpful. Do you like tips like these? I’m thinking of doing more posts like this, what do you think?
So pretty, Diane! I am obsessed with sprinkles. Hope you have a happy 4th with your family!